AWS IAM (SAML)
AWS IAM Identity Center provides SSO identity management for users who interact with AWS resources (such as EC2 instances or S3 buckets). You can integrate AWS IAM with Cloudflare Zero Trust as a SAML identity provider, which allows users to authenticate to Zero Trust using their AWS credentials.
- Admin access to an IAM Identity Center organization instance ↗
To set up SAML with AWS IAM as your identity provider:
-
Open your IAM Identity Center console ↗ and go to Applications.
-
Select the Customer managed tab.
-
Select Add application.
-
Select I have an application I want to set up.
-
For Application type, select SAML 2.0.
-
Select Next.
-
Enter a Display name for the application (for example,
Cloudflare Zero Trust). -
Download the IAM Identity Center SAML metadata file. You will need this file later when configuring the identity provider in Zero Trust.
-
Under Application metadata, select Manually type your metadata values.
-
In Application ACS URL and Application SAML audience, enter the following URL:
https://<your-team-name>.cloudflareaccess.com/cdn-cgi/access/callbackYou can find your team name in Zero Trust under Settings > Custom Pages.
-
Select Submit.
-
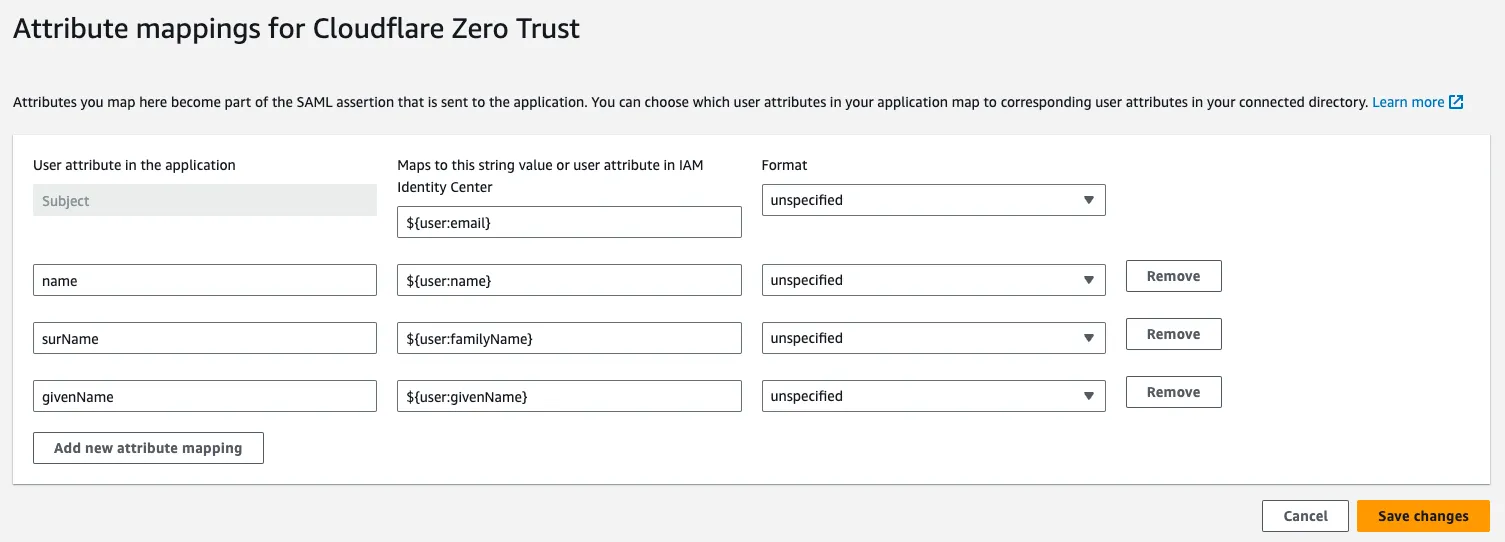
Next, select the Actions dropdown menu and select Edit attribute mappings.
-
For the
Subjectuser attribute, enter${user:email}. -
(Recommended) Add user name attributes:
| User attribute | String value |
|---|---|
name | ${user:name} |
surName | ${user:familyName} |
givenName | ${user:givenName} |

-
Select Save changes.
-
Under Assign users and groups, add individuals and/or groups that should be allowed to login to Zero Trust.
-
In Zero Trust ↗, go to Settings > Authentication.
-
Under Login Methods, select Add new.
-
Select SAML.
-
Enter a Name for the IdP integration (for example,
AWS). -
Upload the IAM Identity Center SAML metadata file that you downloaded in Step 8.
-
(Recommended) Enable Sign SAML authentication request.
-
Select Save.
To test that your connection is working, select Test.
{ "config": { "issuer_url": "https://portal.sso.eu-central-1.amazonaws.com/saml/assertion/b2yJrC4kjy3ZAS0a2SeDJj74ebEAxozPfiURId0aQsal3", "sso_target_url": "https://portal.sso.eu-central-1.amazonaws.com/saml/assertion/b2yJrC4kjy3ZAS0a2SeDJj74ebEAxozPfiURId0aQsal3", "attributes": [ "email" ], "email_attribute_name": "email", "sign_request": true, "idp_public_certs": [ "MIIDpDCCAoygAwIBAgIGAV2ka+55MA0GCSqGSIb3DQEBCwUAMIGSMQswCQYDVQQGEwJVUzETMBEG\nA1UEC.....GF/Q2/MHadws97cZg\nuTnQyuOqPuHbnN83d/2l1NSYKCbHt24o" ] }, "type": "saml", "name": "AWS IAM SAML example"}